
Eyeshadow may seem like pure decoration, but it’s really more like sketching with color. To learn how to apply eyeshadow like a pro, you first need to understand its basics—form, texture, and finish. Like learning to use a pencil before drawing a portrait, these details matter.
What Is Eyeshadow and Why Does It Matter?
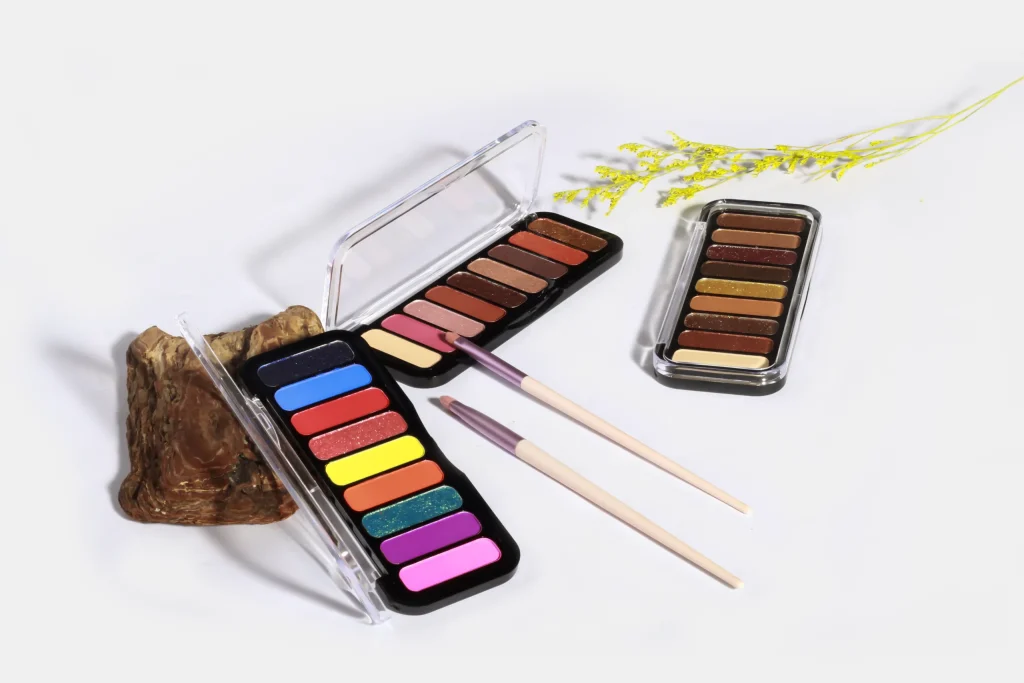
Eyeshadow is a colored cosmetic applied to the eyelids and the skin around the eyes. It’s used to shape, define, or add contrast. Most people use an eyeshadow palette that holds multiple shades to build layers of color.
Imagine your eyelid as a canvas. The way light falls on it can be changed with eyeshadow—just like shadows in a landscape painting. You don’t need fancy shades to begin. What you need is an understanding of how color interacts with light and skin tone.
In makeup theory, the eye area draws attention through contrast and balance. Eyeshadow helps create that by controlling depth—light shades bring forward, dark shades recede. That’s the science behind the art.

Different Types of Eyeshadow: Powder, Cream, Liquid, and Stick
There’s no one type of eyeshadow that works for everyone. Each texture has its own use, like tools in a toolbox.
- Powder eyeshadow is the most common and usually comes in an eyeshadow palette. It blends easily and works well with dry skin. It’s what most beginners start with.
- Cream eyeshadow has a thicker texture and is good for quick looks. It stays longer on oily skin but can crease without a base.
- Liquid eyeshadow often comes with a wand. It’s smooth but dries fast, so blending must be quick. It gives a sharp, vivid finish—like ink on glass.
- Stick eyeshadow is like a crayon. It’s easy to carry, easy to apply. You draw directly onto the lid and blend with a finger or a brush.
No type is better than another. It depends on the effect you want and your skill level. Many professionals mix them, like artists using pencil and watercolor together.
Eyeshadow Finishes Explained: Matte, Shimmer, Satin, and Glitter
Each finish creates a different effect on the eye. Start with matte, the most basic. It has no shine. It adds depth and is great for contouring. Most eyeshadow palettes include matte shades for crease and base work.
- Shimmer eyeshadow has tiny particles that reflect light. It works well on the lid or inner corner to catch attention without overpowering.
- Satin finish is soft. Not fully matte, not fully shiny. Think of it like silk: smooth, with a gentle glow. It’s good for all ages and makes transitions between matte and shimmer look seamless.
- Glitter eyeshadow is bold. It’s full of sparkle and can flake if not applied carefully. It’s best saved for special looks or top layers.
Try different finishes from a single eyeshadow palette. That’s how pros test combinations. One shade, many effects—that’s where skill begins.
Tools You Need to Apply Eyeshadow Like a Pro
Even the best eyeshadow palette won’t help much if you don’t have the right tools. Applying eyeshadow is not just about color—it’s about control. Just like a sculptor uses different chisels, a makeup beginner needs the right brush or applicator to build shape and texture on the eyelid.
Essential Eyeshadow Brushes and Their Functions
There are many types of brushes, but you don’t need all of them to start. Just a few core ones can make a big difference.
- A flat shader brush is for packing color onto the lid. It picks up pigment from your eyeshadow palette and places it directly onto your skin.
- A blending brush has a fluffy head. This one softens edges between colors so they don’t look harsh.
- A crease brush fits into the fold of the eye. It helps apply darker shades that give the eye dimension.
- An angled brush is helpful for lining the eyes with powder or for applying color near the lash line.
Brushes may look similar, but they act differently depending on shape, size, and density. Try using each one with the same shade in your palette and notice how the results change.

Alternatives: Fingers and Sponge Applicators
Not everyone wants to carry a brush set, and that’s okay. Your fingers are good tools, too. They can warm up cream or shimmer eyeshadow and press it onto the lid. This creates a smooth, natural finish.
Sponge-tip applicators are often found in basic eyeshadow palettes. While not as precise as brushes, they can deliver bold color in a single swipe. The trick is to pat, not swipe, to avoid fallout.
There’s no rule that says you must use brushes. Many pros use fingers for certain textures. The goal is not to copy the tool—it’s to understand the effect you want.
Cleaning and Maintaining Your Tools
Dirty tools don’t just ruin your makeup—they can affect your skin. Brushes pick up oil, bacteria, and leftover pigments. Over time, this leads to muddy colors and clogged pores.
Clean your brushes once a week if you use them often. Use gentle soap or a brush cleanser. Rinse with warm water, then reshape and dry them flat. Never soak the full handle—water can loosen the glue inside.
For sponge applicators and fingertips, clean them immediately after use. This keeps color pure and reduces the risk of eye irritation.
In makeup, consistency matters. A clean brush does more than look nice—it ensures that every shade in your eyeshadow palette performs as it should.
How to Prep Your Eyelids Before Applying Eyeshadow
Before you open your eyeshadow palette, take a moment. Prepping your eyelids is like preparing a wall before painting. If the surface isn’t smooth, even the best color won’t stay put. Proper prep helps the eyeshadow go on clean and stay in place—especially for beginners trying to apply eyeshadow like a pro.
Cleansing and Moisturizing the Eye Area
Your eyelids produce oil just like the rest of your face. That oil can break down eyeshadow over time. Start by gently cleansing the area with a mild, non-greasy cleanser. Avoid anything that stings or leaves residue.
Next, apply a lightweight eye cream. Use your ring finger—it applies the least pressure. Keep it minimal. Too much moisture can cause eyeshadow to slide or crease. Think of it like painting on slightly damp paper, not soaked cardboard.
Importance of Eye Primer or Concealer for Long-Lasting Color
Eye primer is not just a luxury—it’s a tool. It creates a thin barrier between your skin and the shadow. This helps the pigment grip better and stops it from fading too fast. Most primers dry quickly and feel weightless.
If you don’t have a primer, concealer is your next best option. Dab a small amount onto the lid and set it with translucent powder. This gives your eyeshadow palette a smoother surface to stick to. Be careful with thick formulas, though—they can crack over time.
A good base keeps colors true. Without it, even the brightest shade in your palette might look dull or uneven.
Neutralizing Discoloration on the Lids
Not everyone has a perfectly even eyelid tone. Some have redness, blue veins, or darkness. That’s normal. But it can affect how your eyeshadow looks.
Use a color-correcting concealer if needed. For example, peach tones cancel out blue veins. Light yellow tones can brighten dark lids. Apply gently and blend well into the skin.
Once the discoloration is covered, your eyeshadow shows up as intended. Think of it as wiping a chalkboard clean before writing. One small change can sharpen the entire look.

Understanding Eye Shapes and How They Affect Eyeshadow Application
Not every eye is shaped the same—and that matters more than most beginners realize. If you’re learning how to apply eyeshadow like a pro, one of the first steps is to understand the architecture of your own eyes. The way eyeshadow sits on the lid depends on how the lid folds, where the crease is, and how much space is visible when your eyes are open.
This isn’t about fixing or hiding anything. It’s about working with what you have—adjusting your technique so your eyeshadow palette actually performs the way you expect it to.
Common Eye Shapes: Hooded, Almond, Round, Monolid, etc.
Most eyes fall into a few general categories. They aren’t strict definitions, just useful patterns. You might even see traits of more than one.
- Hooded eyes have a fold of skin that partly or fully covers the crease. When the eyes are open, the lid seems to disappear.
- Almond eyes are longer than they are wide, with a visible crease and slightly upturned outer corners.
- Round eyes are more open vertically, showing more of the white around the iris.
- Monolids have no visible crease, with a smooth, flat surface from lash line to brow bone.
- Downturned eyes angle slightly downward at the outer corners.
- Upturned eyes tilt upward, giving a lifted appearance.
These aren’t beauty standards—they’re structure. Like knowing the angles of a wall before you hang art, recognizing your eye shape helps with placement and blending.
Eyeshadow Tips Tailored for Your Eye Shape
For hooded eyes, raise the crease with shadow just above where it naturally falls. Use matte shades to create depth, and avoid heavy shimmer on the fold—it can draw attention to the puffiness.
- Almond eyes can wear most styles. Try soft gradients from the lash line to the crease. Use your palette’s lightest shade on the center lid to make the shape pop.
- With round eyes, focus on elongating. Blend darker shades outward, not upward, to give a more oval illusion. A winged shape works well here.
- Monolid eyes benefit from layered color. Start with a base tone, then press shimmer near the lash line. Instead of chasing a crease, create depth with gradient color from lash to brow.
- If your eyes are downturned, lift the outer corner with darker tones angled slightly upward. Use bright tones in the center lid to keep the look fresh and open.
- For upturned eyes, balance the top and bottom lash lines. Add a soft shadow under the lower lashes to match the lid and keep the shape harmonious.
Each eye shape tells its own story. A good eyeshadow palette is just a tool—but knowing your canvas changes everything.
Step-by-Step Guide: How to Apply Eyeshadow Like a Pro
If you want to apply eyeshadow like a pro, you’ll need more than just a good eyeshadow palette—you’ll need structure. This section breaks the process into easy, repeatable steps. Whether you’re a complete beginner or just looking to improve, each step builds on the one before it. Think of it like constructing a scene: background, depth, light, and focus.
Step 1 – Choose Your Color Scheme and Eyeshadow Palette
Start by picking two or three colors that work well together. This could be a neutral palette with browns and beiges or a bold combo like plum and gold. Choose one shade for your base, one for depth, and one for highlighting.
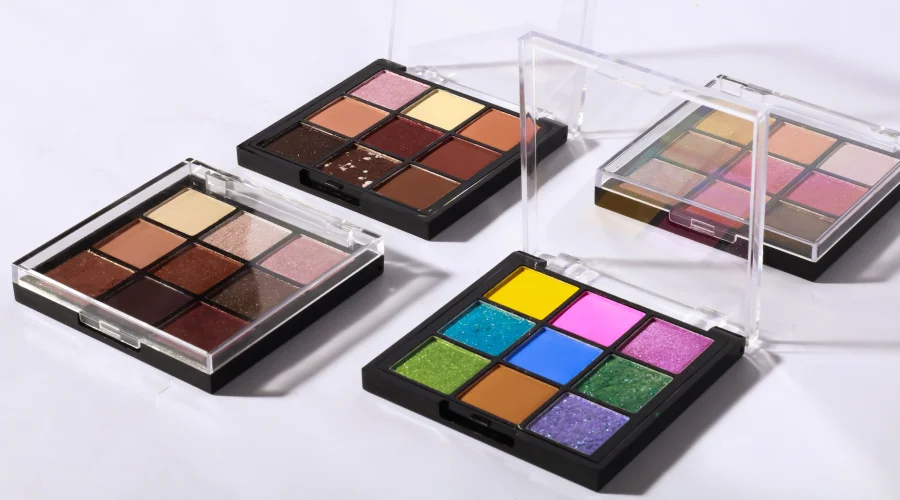
Stick to palettes that group colors by tone or theme—it makes matching easier. You don’t need 30 shades to begin. Even a small palette can create many looks if the tones contrast well.
Tip: Beginners often start with warm neutrals. They tend to blend easier and suit most skin tones.
Step 2 – Apply the Transition Shade to the Crease
The transition shade is usually a soft matte color that’s slightly darker than your skin tone. Use a fluffy blending brush to apply it in a windshield-wiper motion through the crease.
This step helps later colors blend more smoothly. Think of it as the “middle ground” that prevents harsh edges between the lid and brow bone.
Start with light pressure. You can always build color, but it’s harder to take it away.
Step 3 – Deepen the Outer Corner with a Darker Shade
Use a smaller brush to press a darker color—like brown, charcoal, or burgundy—into the outer third of your eyelid. This gives depth and definition.
Don’t cover too much of the lid. The idea is to anchor the eye, not overpower it.
Blend this color slightly into the crease to tie everything together. Soft edges are key.
Step 4 – Brighten the Lid with a Lighter or Shimmer Shade
Now apply a lighter or shimmer shade to the center or inner part of the eyelid. Use a flat brush or your fingertip for maximum impact.
This step brings light to the eye. If your palette has a metallic or pearly tone, try that here. It makes the eye look open and awake.
Place the color carefully—don’t drag. Tap it on to keep the shimmer clean and even.
Step 5 – Blend, Blend, Blend: The Key to Pro Results
Blending is where most beginners either win or lose their look. Use a clean blending brush to soften any harsh lines between shades. Use small circular motions and light pressure.
If two colors meet and look patchy, add a tiny bit of the transition shade back in. Think of blending as erasing the borders between each step.
A pro look doesn’t depend on perfect pigment—it depends on smooth transitions.
Step 6 – Add Dimension to the Lower Lash Line
Use a small smudge brush or angled liner brush to sweep some of the crease or outer-corner color under your lower lash line.
Keep it soft—this isn’t eyeliner. It’s meant to mirror the top lid and make the look feel balanced.
If you like a little more edge, add a deeper tone to the outer lower corner.
Step 7 – Highlight the Inner Corner and Brow Bone
Finish the look by tapping a light shimmer or satin shade onto the inner corner of the eye and just under the highest point of the brow arch.
This catches the light and makes the whole look feel more dimensional. Use a small pencil brush or fingertip. Don’t go too heavy—it’s just a touch of brightness.
This final step pulls everything together and gives the look a polished, pro-level finish.
Eyeshadow Color Tips for Beginners
Color can be the trickiest part of using an eyeshadow palette—especially when you’re starting out. Should you match your outfit? Your eyes? Your mood? The answer depends on what you’re going for. But one thing is certain: understanding how color works makes the process less overwhelming. You don’t need a degree in design—just a few simple guidelines.
Choosing Colors Based on Your Skin Tone
Skin tone can change how eyeshadow appears once applied. A shade that looks warm in the pan might turn cool or ashy on a deeper complexion, and a pale shimmer might disappear on fair skin.
- Fair skin: Soft taupes, pinks, light browns, and peachy tones are easy starters.
- Medium skin: Warm golds, coppers, rose shades, and bronzes show up beautifully.
- Olive skin: Terracotta, plum, warm browns, and greens work well with the undertones.
- Deep skin: Rich purples, jewel tones, and vibrant metallics pop without looking harsh.
You don’t have to stay in your “zone.” But knowing what flatters your base tone can make experimenting with a new palette less confusing.
Basic Color Theory: Complementary and Analogous Tones
Let’s keep this simple: colors that sit next to each other on the color wheel (analogous) blend smoothly. Colors across from each other (complementary) create contrast.
- Analogous example: gold, bronze, copper — these melt into each other.
- Complementary example: orange and blue — great for high drama.
If your eyes are blue, warm tones like copper or peach will make them stand out. If they’re green, purples and burgundies bring contrast. Brown eyes? Lucky you—almost anything works, but blues and greens add vibrance.
Use this idea when building looks from your palette. Too much contrast can get muddy if not blended well. Start with tones close to each other, then add contrast once you’re comfortable.
Everyday Natural Looks vs. Bold Statement Looks
Natural looks use shades close to your skin tone. These are perfect for school, work, or days when you want a subtle touch. A typical go-to includes matte beige, taupe, and soft brown shades from a neutral eyeshadow palette.
Statement looks are for fun, drama, or evening events. These might use bold colors—teal, plum, silver, or even neons—and mix matte with shimmer. Placement changes too. You might extend the outer corner, cut the crease, or layer glitter.
Try both. One teaches control, the other creativity. Eyeshadow is one of the few places in makeup where you can break rules safely. Practice both styles to develop a feel for what works—and what you enjoy.
Common Eyeshadow Mistakes Beginners Should Avoid
Even with the perfect eyeshadow palette, small mistakes can throw off the whole look. That’s normal at first. Everyone struggles with blending or choosing the right shade. The key is knowing what to avoid—and why it matters. These common errors are easy to fix once you recognize them.
Skipping Primer or Using Too Much Product
Skipping primer is like painting on oily glass—your eyeshadow won’t stick. It may crease or fade fast. On the flip side, using too much product (especially creamy concealer or thick primer) creates a slippery base. That causes patchy spots and cracking.
Use a thin layer of eye primer or a light dab of concealer, then tap it dry with powder before applying shadow. A good base helps the pigments show true and stay in place.
Not Blending Properly
This one shows up a lot—harsh lines between colors, uneven tones, or one dark spot stuck in the middle. Without blending, even high-end palettes can look messy.
Take your time. Use a clean blending brush to smooth edges where colors meet. Use small, circular motions and soft pressure. If one color looks too strong, go back in with the transition shade to blur it gently.
Blending isn’t a bonus step—it’s the step that makes everything look pro.
Using the Wrong Brush or Application Technique
Every brush has a purpose. A big fluffy brush can’t place pigment precisely, and a stiff brush won’t blend well. If your colors look muddy or patchy, your brush might be the reason.
- Use a dense, flat brush to pack color onto the lid.
- Use a fluffy brush to blend.
- Use a small brush for detail or the lower lash line.
And always tap off excess shadow before applying. It prevents fallout and helps control how much you place.
Overloading the Eyelid Without a Transition Color
Piling on eyeshadow without a transition shade can create a heavy, unbalanced look. It’s like adding shadows to a face without contouring—there’s no gradient.
Always start with a neutral mid-tone in the crease. This shade acts as a buffer between the lid color and the brow bone. It helps all the other shades blend into something seamless.
A well-placed transition shade can make even bold colors feel polished.
How to Practice and Improve Your Eyeshadow Skills
Eyeshadow application is part technique, part habit. You won’t get it perfect the first time, and that’s the point—practice reveals what works for your eye shape, palette, and style. The goal isn’t fast results. It’s muscle memory, control, and creativity.
Start Simple with Neutral Tones
Neutral colors—soft browns, taupes, peaches—are forgiving. They blend easily, don’t stain the lid, and suit almost any skin tone.
Start with a basic three-step routine:
- A base shade over the lid.
- A transition tone in the crease.
- A slightly deeper shade at the outer corner.
Use the same eyeshadow palette for a week. Focus on placement and blending, not new colors. This builds consistency.
Practice Symmetry and Brush Control
One common struggle is keeping both eyes looking even. The best way to fix that? Slow down. Apply small amounts at a time, and mirror your steps between eyes instead of doing one eye fully at once.
Work with light pressure. Don’t stab or drag. Let the brush do the work. Practicing on paper or a sketch pad (yes, really) helps train your hand to move smoothly.
It’s about precision and intention—not speed.
Learn from Tutorials and Practice on Different Eye Shapes
Online tutorials can be helpful, but focus on creators with similar eye shapes. What works on deep-set eyes may not work on monolids. Watch the placement, not just the colors.
If you can, practice on a friend or mannequin with a different eye structure. It teaches you to adapt. Even tracing shadow with your finger before using a brush helps build awareness.
>> Should a 60-Year-Old Woman Wear Eyeshadow? How to Do it?
How to Remove Eyeshadow Without Irritating the Eyes
Removing eyeshadow sounds simple—but the skin around the eyes is thin and sensitive. Tugging, rubbing, or using harsh products can lead to dryness, redness, or irritation. A good removal routine keeps the eye area clean and calm, especially if you’re wearing bold looks often.
Best Practices for Gentle Eye Makeup Removal
Always start with clean hands. Use soft cotton pads or reusable rounds—not rough tissues. Press the remover onto the lid and hold for 10–15 seconds. This allows the product to break down pigment without friction.
Then, gently wipe downward and outward. Never scrub. You’re removing, not exfoliating.
Avoid using facial wipes alone. They don’t break down waterproof or layered makeup well, and the rubbing can harm delicate skin.
Products That Help Dissolve Eyeshadow Easily
Use oil-based or dual-phase removers—they dissolve powders and creams more effectively. Micellar water can work for lighter looks, but heavy shimmer or waterproof formulas need more strength.
Look for removers labeled “eye-safe” or “ophthalmologist-tested,” especially if you wear contact lenses.
Cleansing balms are also a great option. They melt makeup gently and rinse off without residue.
Post-removal Care for the Eyelid Area
After removal, rinse with cool water to remove leftover product. Pat dry with a clean towel.
Apply a lightweight eye cream or fragrance-free moisturizer. This helps restore the barrier, especially if you’ve been wearing makeup all day.
If the area feels tight or itchy, give it a break—skip makeup the next day and let the skin breathe.
Conclusion
Mastering eyeshadow takes patience and practice, but even beginners can achieve polished looks by understanding the basics, using the right tools, and applying thoughtful techniques. Experimenting with color and blending helps build confidence. Remember, every pro started somewhere—keep practicing!
>> Top 10 Secrets to Finding the Best Makeup Eyeshadow Palette